Starmine
From PyroGuide
|
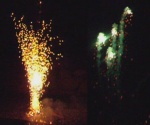
Starmines are pyrotechnic device that fire a cloud of stars up into the sky. The effect is short, but spectacular and they are very commonly used in professional displays. There are several ways in which to make a starmine, the one outlined below is a good project for beginners due to its simplicity and size. The starmine described here consists of a thick walled paper tube that is tightly sealed by a clay end plug on one side. A paper plug only seals the other side. Inside the starmine, a lift charge and some stars are placed. The entire device is glued to a wooden base for stability. When the mine is fired, the paper plug gives way and the stars are shot upwards into the sky reaching about 10 to 15 meters (~30 - 50 ft) in height. Then they rain down, and burn out before they reach the ground. |
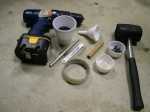
[edit] MaterialsCasing End plugs Fuse Lift charge Stars Rammer or wooden dowel Misc items |
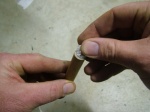
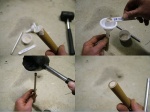
[edit] ConstructionFirstly you need to make the top end plug. Do this by scrunching up tissue paper or a piece of toilet paper and stuffing it into the casing. Insert your rammer and using your rubber hammer give the rammer a few decent whacks to compact the paper tightly in the tube. Then using the rammer push the paper plug out the bottom. You need a plug that is approximately 8-10 mm (~ 3⁄8") in thickness. Don't make it too thick as you want the starmine to remain intact (withstand the pressure from the lift charge) long enough to build up sufficient pressure to fire the stars high up in sky. On the other hand, you want to be sure that the stars be actually fired. Not crushed or burst through the sides of the mine. Therefore, the top plug should be the weakest part of the device so that you are sure it will burst there. |
|
Take the casing and seal one end of it with a small piece of paper tape. Stand the casing upright on a solid surface and using your funnel place a 1⁄4 of a teaspoon of powdered clay into the casing. Insert the rammer into the casing and with your rubber hammer give the rammer a few good thumps. Be careful not to hit it to hard as you may split your casing at the base rendering it useless. It just needs to be firm enough to compress the clay powder until it's hard. Your aim is to create a clay plug this is the same thickness as the inner diameter of your casing, in this case 10mm ( 3⁄8"). You may need to add another 1⁄4 of a teaspoon of powder clay to achieve this. Remove the paper tape from the base to expose the clay end plug. |
|
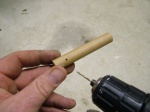
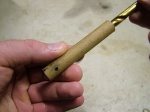
Use your drill to make a small 2mm (~ 1⁄16") hole just above the clay plug. This is where the visco fuse will be inserted. Do not drill a hole that is too large otherwise the internal pressure generated inside the casing with escape out of the hole and result in your effect stars not being ejected. |
|
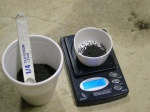
Now weigh out 1.5 grams of lift powder using your digital scales. Depending on the quality of your lift powder you may need to adjust this. The stronger the powder the less you need to use and vice versa. If you are not sure of the performance quality of your powder, it is better to add less. You don't want the starmine casing exploding at effect time or throwing them so high and fast they fail to ignite. Add your lift powder to your casing using your funnel. |
|
Depending on the size of your stars, insert 3-4 stars inside the casing so they sit on top of the lift powder. You need to ensure you leave a minimum of 1⁄4 of casing space so we can insert our top paper end plug. If you have smaller stars and are in a position were you can insert more you will need to add a little meal powder so that it surrounds the stars. This will help to ignite them at effect time. You don't want half of your effect stars being fired into the air unignited. |
|
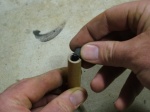
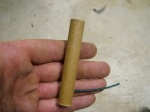
Finally we need to insert the top end plug inside the casing. Using your rammer, push the plug down until it just comes in contact with the stars. Don't push the plug down too far as it may damage your stars. If you find that after firing your starmine you did not achieve a respectable height, you can place a very small amount of hot melt glue on top of the end plug. This will generate more pressure inside and fire your stars harder out of the casing. However do not add too much glue so it results in your top end plug becoming stronger that the walls of your tube. If you do, your starmine will explode, potentially throwing stars in unpredictable directions. The device now needs to be secured on a wooden board or similar with a big blob of hot melt glue. |
|
Reloading You can reload your casing as long as the previous shoot not has damaged it. Give your casing at least 30 minutes to rest before reloading, as there may be some hot embers inside you can't see. This can be dangerous when you are reloading new black powder, as it could ignite unexpectedly. Examine your fuse hole to ensure it is still in good condition and has not been burnt into a bigger hole. This also includes a good examination of the casing walls. If the casing walls are thick enough you should get several shots before having to retire it. Before reloading your tube, it is recommended you clean it with a large drill bit. Use a 9mm or 10 mm (~ 3⁄8") drill bit, and with your fingers gently slide this inside the casing and twist to remove any unwanted dross. If you are not sure your casing can withstand another shoot then don't risk it... |
[edit] Video
3 green stars - 2.1 meg - 3 green star starmine.
4 green stars - 1.7 meg - 4 green star starmine.
2 glitter and 1 green star - 982kb - 2 EB 2 - Glitter stars and 1 green star starmine.
